| Webmaster's Note: Premier
modeler Charlie Rowley (Chariots
of Fire) emailed me concerning Steve McGuire's article on Making
Your Own Decals. For some reason, I lost Charlie's email and
just found it. .
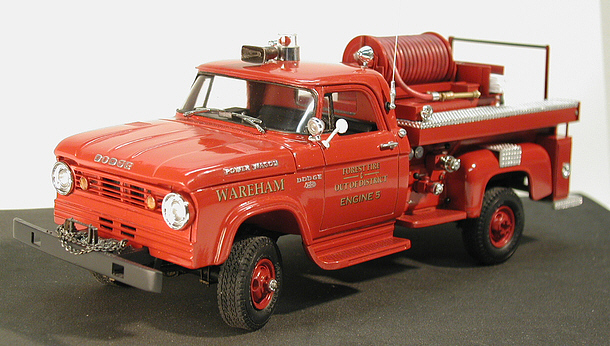
Saw the article by Steve McGuire on making decals. He did a thorough job of explaining how he does his work. I do the same thing (Make my own decals) for the apparatus that I build but I use an entirely different method. Much of what I do is scratch building so decals are not easy to come by unless I rob an old AMT ALF kit. Those letter sets are ok but there is nothing like making your own; besides you don't have to cut out every single letter and set them in place individually! Decals that are truly individual have to be created by hand. Where I can, I use photos of real apparatus designs for logos, company identification and gold leaf trim. I take a close-up photo of what I want to reproduce and then scan it into the PC. Once there I clean the whole thing up using Windows Paint. That means getting rid of the background and filling in all color and detail with whatever color is required. It is important not to leave any oddball colors from the original scanned photo. In my case this is important to make the graphics program and printer work properly together. To make sure that I have not left any strange colored pixels around I usually color the area with a contrasting color that I am trying to reproduce. The oddball pixels stand out better that way. Once completely cleaned up and no oddball pixels are left, I just change to the actual color that I want printed.
I also use Micrographx to create lettering and company numbers for apparatus. The program allows me to create lettering on curved lines, around a company seal or logo, for instance, or in any combination of shapes I might want to apply. Again they are scaled down to fit after the design work is completed. Since I use an ALPS printer I can print white, gold or silver as well as ordinary colors. This is fantastic for emergency vehicles and the quality of the decals is excellent. I use plain decal paper that has a blue background. That way decals that are printed in white can be seen. Print them on decal paper with a white background and you have trouble locating them after they are printed. The other nice thing about the ALPS printing process is that it is a dry process. The printing cartridges are similar to the old typewriter cartridges that were used in IBM Selectric typewriters. The decals that are printed with the ALPS can be immediately be soaked in water and can be transferred to the model with no adverse affects. After they are dry and hit with Solvaset, however, they are generally given a light coat of clear lacquer toseal the surface. They can rub off with enough handling. Since decal paper can be expensive I use it in small pieces that are only as large as necessary for the work I'm doing. The design or series of letters is printed first on a plain piece of white paper. After it runs through the ALPS I cut out a piece of decal paper somewhat larger than what I need to print the design and place it over the design that was printed on the white paper, holding it down with clear tape on all four sides. You have to makesure that the edge of the tape is well away from the area that is to be printed; about 1/8" from the edge of the decal paper. The white paper is then reinserted into the printer making sure the design orientation is the same as how it first came out of the printer and the design is printed out again in the same place on the paper but this time on the taped down decal sheet. This way itsaves on decal paper and a lot of it is not wasted if something goes wrong in the printing process.
|
