Making Your Own Decals
By Steve McGuire
Now that I have done this successfully a number of times, along with screwing up even more times, I feel that I am sage enough to share what I have learned (through trial and error) over the years about this process with my fellow hobbyists. I don't claim to be an expert, but hey...I feel good. I am also a tail-end “Baby-Boomer”, rather than a “Generation-X” (or later) product. This simply means that I remember the moon landing and key-punch cards, and wasn’t born with a keyboard in my hands. So, you hot shot computer-literate youngsters need to bear with me. I just wish I had somebody give me directions the first time tried to make decals (with paint and a paintbrush…before computers!). I wound up using a lot of money and bad language. This is the first part of an article which may run to a few more parts, and my intention here is to provide the most basic advice to anyone who has nothing more than a computer, printer, and a couple of fingers to type with.
Part I-The Bare Basics.
Using your out-of –the box PC and printer to make decals.
SUPPLIES-What do I need?
Items you will need are:
1. Decal Paper. This is available from a number of sources, some good, some not. What is important is that you order the right type of decal paper. There are two types (that I know of): Inkjet and Laser decal paper. There is an important difference. Decal paper is not porous. It is basically a micro-thin sheet of vinyl. Inkjet paper has a special coating which prevents the ink from your inkjet printer from beading and running on the surface. Laser decal paper is for use only in laser printers, and is specially formulated to withstand the high temperatures of the printing process that those printers use.
All decal paper comes in either clear or opaque (white) sheets. Some manufacturers do offer other colors, but white is what most of us would use. It is critical that you choose the correct media. All inkjet and bubble jet printer inks (except black) are transparent, and require a white background to show properly. The only time you would use clear decal paper is if your model is actually white. If you are putting decals on a red or black model, you will have to use white decal paper. Most decal paper is sold as 8-1/2 x 11 sheets.
2. Decal Fixer. You MUST seal your decals after you print them and before you can use them. Let the ink l set when they come out of the printer for at least a day in a dry place before you seal them. There are a few fancy (and expensive) products on the market for this purpose, but Krylon Clear Acrylic spray is as good as or better than any of them. You can get this in gloss, satin, and flat. I use satin, because I always clear-coat my entire model with a gloss topcoat when I’m all done anyway.
2. Printer. A quality inkjet printer (I recommend a minimum 1200 dpi color or better) is important. I have a HP-2410 and it’s excellent. Epson, Canon, Brother or Lexmark will do the job too. As I have mentioned before, the inks used by all of these printers are transparent. The only consumer printers that will print solids on clear decal paper are the ALPS MD series of printers, and they will only print white, black, or metallic as solids. They are no longer available, except on ebay. If you are serious about printing a lot of white or gold lettering, you may want to invest in a used ALPS. If you do decide to buy an ALPS, be aware that they require Laser decal paper.
GRAPHICS-Where do I get them?
Graphics are the starting point, of course. A computer with at least Windows 98 is a good idea. Unfortunately, I am not familiar with Macs so I have to stick with PC’s. A good graphics program is definitely helpful, but not essential, to produce some good graphics. A good place to snatch some ready made graphics is the Internet. For example, if you want a particular logo or emblem, find a webpage that has it in the header. The home pages for most corporations or Emergency Services usually have the logo or emblem prominently displayed. I don’t encourage or condone ripping off anybody else’s work, so check to see that there are no copyright issues. If you are doing this for yourself and not for profit, it wouldn’t hurt to ask permission. For Flag and Patriotic items, there are a few websites which have tons of stuff that is available for free downloading. You can then copy an image directly from most web pages to a directory or folder on your computer.
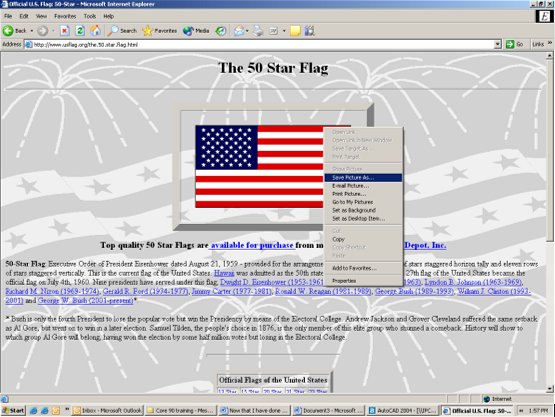
1. Go to the URL of the site that you think contains the graphic that you want. As an example, I will use An American Flag from www.usflag.org.
2. Place the cursor over the graphic image that you want.
3. Right-click, select “Save Picture As”.
At this point, a dialog box will appear with a line for “File Name”. Windows usually defaults to the system directory of “My Documents” or “My Pictures” as the folder in which to save your copied graphic.
Just below the “File Name” line is one that asks “Save as Type”. The web image is usually a .jpg, or a .gif, or sometimes .bmp type file. The basic differences between these file types are that you can edit and modify a bitmap (.bmp), but not a j-peg (.jpg) or a .gif file. Bitmaps tend to be much larger files than j-pegs or gifs. The j-peg and gif files are often just compressed bitmaps so that they could be uploaded more easily and use less server space. The only time you would want to save a downloaded image as a bitmap is if you have to trim it or erase a portion. Most graphics software, like Corel or Adobe, opens any image that you ell it to as a bitmap for those very reasons-no matter what you saved it as But that’s for another segment.

Hopefully, most of you have a scanner or a digital camera, and you have some sort of picture viewing utility that came with your device installation software, for example Adobe Photoshop Home Edition or Kodak Easy Share. Microsoft Office also has a decent photo editor. Later versions of Windows also have some kind of viewer or you can download one for free. These programs will allow you to open and edit your newly acquired image. By editing, all you should really have to do is edit the size of the image to make it suitable for your model. You should have some idea of the proportions of the image on the actual vehicle. When you open the image in your viewing utility, select “Print” or “File”, then “Print Preview”. This will show you how your printer will spit it out. Don’t worry that it’s too big right now. Next, print the image out on plain paper. Some utilities also allow you do multiple copies (i.e. “wallets”) on the same page, which is good when you need multiple images of the same item.
HOW’S YOUR MATH?
Now it’s time to break out the old calculator. You have your printed image in front of you. It’s helpful but not necessary; to have a picture of the actual vehicle that you are modeling in front of you just for a proportional reference, and of course you will need to take some measurements on the model itself. Now, bear with me. Maybe some of you math geeks know a more direct route here, but this works for me:
1. Measure the area on your model where the graphic will be. Let’s say it’s the Maltese Cross for the Hoozawatsit Fire Department, which is on the door of the vehicle. The driver’s door on your 1:64 scale model is approximately 7/16” wide. You look At the photo of the real truck. You now know that the actual door is 28 inches wide, because .4375 (7/16”) divided by .016525 (1/64”), equals 28. We all know that in 1:64 scale, 1/64”=0’-1”, right? Just in case, here’s a table:
|
SCALE CONVERSION TABLE |
||||
|
SCALE |
MODEL RR EQUIVALENT |
TEXT EQUIVALENT |
DECIMAL (INCHES) EQUIVALENT |
METRIC CONVERSION (MILLIMETERS) |
|
1:87 1:64 1:55 1:50 1:48 1:43 |
HO S - O O Super-O |
1 Inch equals 87 inches 1 inch equals 64 inches 1 inch equals 55 inches 1 inch equals 50 inches 1 inch equals 48 inches 1 inch equals 43 inches |
.0115 .0156 .0181 .0200 .0208 .0232 |
.0115 / .0394 .0156 / .0394 .0181 / .0394 .0200 / .0394 .0208 / .0394 .0232 / .0394 |
2. Look at the real graphic on the real vehicle. Estimate what percentage of that door width it occupies. Let’s say it looks like, ohhhh…about 2/3” of the width.
28 / 3 = 9.3333,
9.3333 x 2 = 18.6666, 2/3 of 28
Now you can assume the actual width of the Maltese Cross is somewhere around 18.66 inches
3. Determine the size of the graphic that you just printed. Measure it with a ruler. Let’s say its four inches wide. Now you will have to reduce this down to the right size.
4. You already know that the actual width is somewhere around 18.66 inches. In 1:64 scale, this would be
18.66 x .0156 or .291 inches, just a hair more than 9/32”. Your printed graphic measures four inches. Now you have to find what percentage your scaled down image will be from your printed image.
.291 / 4 =.073 or 7.3% of the printed image’s full size.
5. Open your photo-editing utility. Most of these programs give you a choice of resizing the image as a percentage of actual size (type in 7.3% where provided) or they default to inches or pixels. In that case, the program will give you the size of the image in whichever unit. It’s a good idea to select inches (or centimeters) as your measurement unit. Leave the pixels alone. Multiply each of these (length and width) by .073 and enter the results where provided. Generally, the larger the size of your original in pixels, the better the image, because the resolution is higher. It is much better to start with a huge file and reduce it to your requirements than it is to start with a small one and blow it up. Save the new image with another name in the same directory as your original.
6. Now the most important part: Your Printer. Your computer doesn’t care how tiny the image on your screen is, but your printer does. The resolution of modern inkjet printers is astounding, and they are capable
Of printing tiny images with amazing clarity. Open your printer settings and set your printing preferences to “Best” or “Maximum dpi”. This setting will use a lot of ink, memory, and time. Print it on plain paper to see how it will look. Inkjet decal paper prints as well as photo paper, so if you think it looks good on plain paper it will look even better on the decal paper. In the next segment, I will talk a bit about adding lettering to your layout using basic Windows programs. Until then, keep on modeling!